Monkey Fist
The Monkey Fist is not just a part of an animals anatomy, it is also the name of a useful knot. This relatively complex looking knot is easy to tie, and adds weight to the end of your rope which makes it easier to toss your mooring rope to a friend on the dock. Don't let go of the end of your rope. Don't throw it so hard that you knock them over! The biggest issue when tying this knot is to allow enough rope for the working end. What seems like a lot of rope will be needed. The good news is that the Monkey Fist is relatively easy to untie so that you won't waste your rope length. This is another one of those knots that others will watch and ask you to show them how to tie - plus it is fun to say "Monkey Fist".
Understanding Knot Basics
Just like knots used to tie line to hooks and lures there is certain terminology useful to review. There are two ends of the rope. In general one end is attached to the vessel or the dock. The other end, called the working end is used to tie the knot, hitch or bend. Often the standing end or that end secured to the dock or boat will be under load as you pull the boat to the dock or pier. Unlike with fishing line, when tying dock or mooring knots or hitches, you rarely will want to cut excess rope left on the working end. A 25 foot rope will become a 12 foot rope quickly if you continually cut off 6-12 inches. Then you are left with the need to always devote extra time and attention to prevent the rope from unravelling.
Monkey Fist - Step One
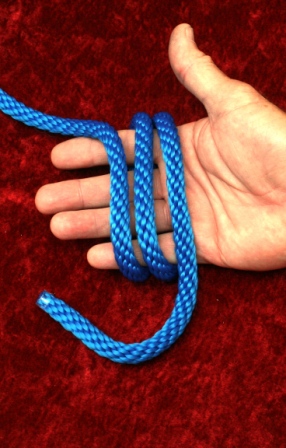
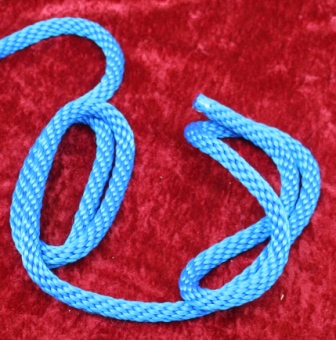
Step one of tying the monkey fist knot is to allow plenty of excess rope in your working end as you will be making at least 9 loops around in the process. Begin by making three loops around your hand at the knuckles as in the picture. No need to make this tight at this point since you will remove your hand in the next step. Arrange the rope with the three loops remaining in tact as shown in the picture below.
Step Two
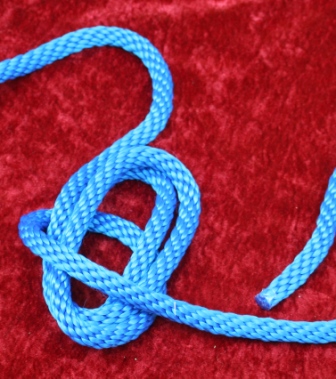
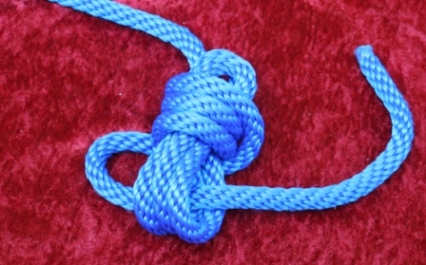
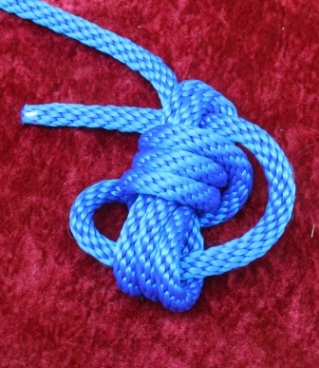
Step two in tying this knot is to carefully wrap your working end around the middle of the three loops that you formed in step one. Make your wraps in the direction shown in the picture - climbing up toward the top of the knot. The picture above shows the first loop. Note in the picture below how the knot looks after the third loop.
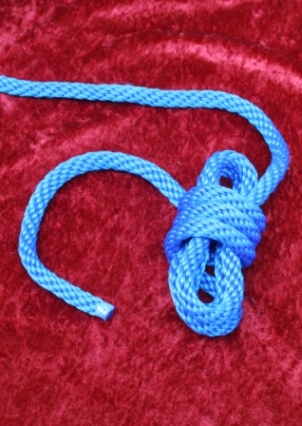
Step Three - Forming a Box Loop
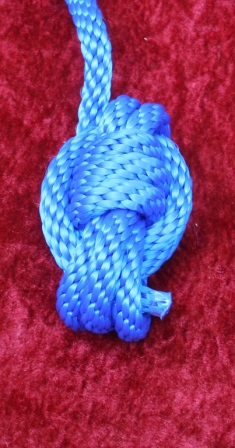
Step three begins what can be called a box loop. Pass the standing end through the loops formed in step one at the bottom of the knot. Pass the standing end around and through the loops at the top of the knot as shown in the picture below. Repeat this two more complete times.
Final Step
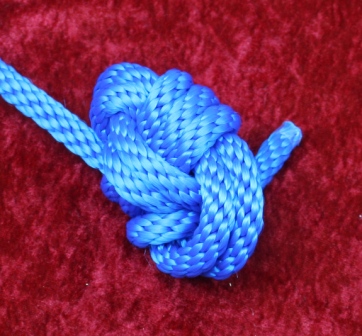
The final step in making the Monkey Fist is to tighten this knot, However it does not need to be extremely tight, just not totally mushy. Pull the standing end, pull the working end. Work some of the looseness out and you will be good to go. Now your friends will be jealous - and want to have you teach them how to do this one.
Fishing Knot Guides
We are an Amazon Affiliate. If you purchase a recommended product we stand to earn a small commission from qualifying purchases. If you click on one of our recommended products and purchase a different product from Amazon we may also receive a small commission. These products do not cost you any more than what is posted. Our staff recommends items that we have personally owned, tested, researched or we have fished with trusted anglers who recommend them.
These four resources come highly recommended. We at PFT each carry the freshwater knot guide in our tackle. Several of us use the knot tying tool on the right. I have a knot tying book like this one on my desk, but in addition have downloaded a knot tying app on my phone, which I use regularly.