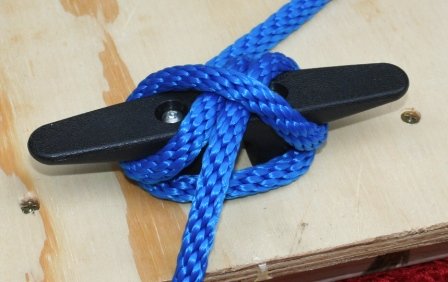
Cleat Hitch
The cleat hitch is a great knot that is secure and easy to remove when wanting to secure your vessel to a dock cleat. Perhaps the quickest and easiest to learn to tie, you will want to utilize this one. If your mooring rope did not come with a built in loop, a bowline knot can be used to loop around a post, cleat or railing. Sometimes a mooring knot is used to tie to a dock, or when something of less weight needs to be tied to a railing on the boat.
Understand Knot Basics
Just like with knots used to tie line to hooks and lures there is certain terminology useful to review. There are two ends of the rope. In general one end is attached to the vessel or the dock. The other end, called the working end is used to tie the knot, hitch or bend. Often the standing end or that end secured to the dock or boat will be under load as you pull the boat to the dock or pier. Unlike with fishing line, when tying dock or mooring knots or hitches, you rarely will want to cut excess rope left on the working end. A 25 foot rope will become a 12 foot rope quickly if you continually cut off 6-12 inches. Then you are left with the need to always devote extra time and attention to prevent the rope from unraveling.

As an Amazon Associate we earn from qualifying purchases. Recommended items have been personally owned, tested or we have fished with anglers who were using them.
Tie the Cleat Hitch
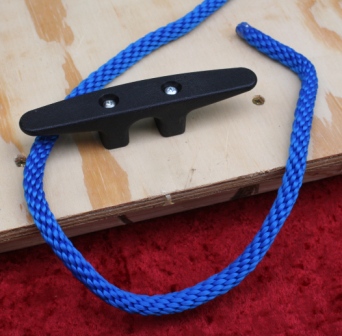
The first step to tie this hitch is to get the working end of the rope to the cleat. This can be tossed or handed to a helper, or if you have pulled your boat close enough to the dock you can reach our with your rope and make one loop around the cleat post. This one loop helps to secure the load or weight of your boat so you can complete the remainder of this knot or hitch
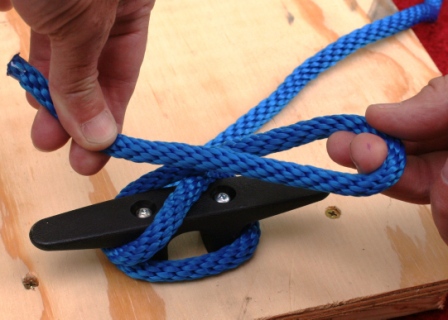
Step Two
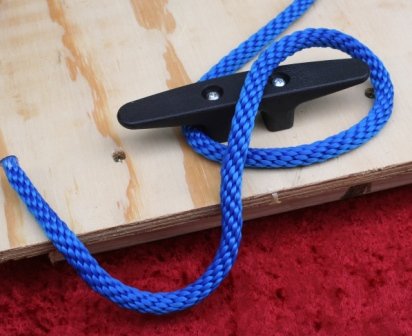 Cleat Hitch Step Two
Now you take the working end of your rope and begin a wrap criss crossing one time around each end of the cleat. You can already feel that your boat is secure so long as you place some kind of a lock in your knot. See the picture below to view the criss cross described.
Hitch / Round Turn
Cleat Hitch with Round Turn simply means you make one complete turn around the cleat post before beginning the criss cross..
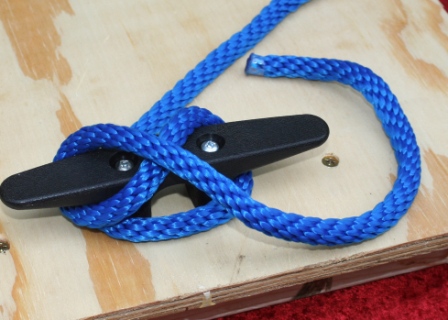
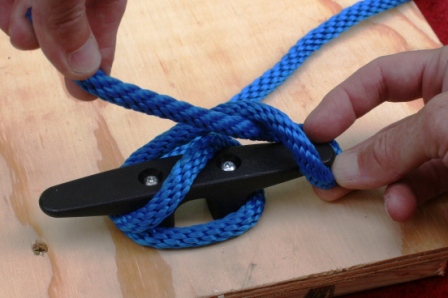
Final Step
 CH Locking Step
Now pass the working end of your rope under the rope just before your last loop around the cleat as shown in the picture above. With this done you are ready to tighten the hitch onto the cleat. Notice how clean and neat the hitch appears in the picture below.
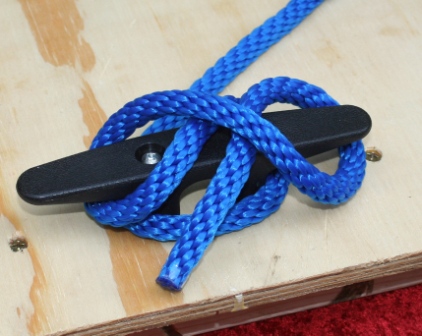
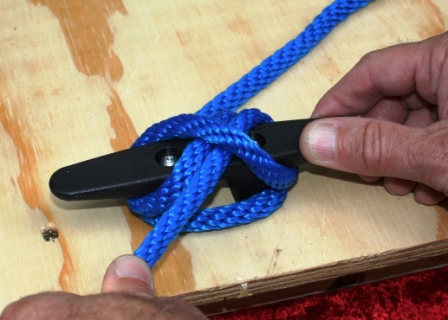
 Tightened Against Cleat
Variation
Three straight pictures to show a twist variation to complete your lock step. This is also an excellent way to finish off excess rope left on the working end. Simply add one or more twist locks as you have enough rope to do. Grab the rope, make a twist placing the twisted loop over the cleat and pull tight. Repeat until all the rope is used up.
 Twist to Help Lock
 Twist Step Two
 Twist Step Three