Clinch Knot
 Clinch Knot
The clinch knot is one of the easiest to tie and a very versatile fishing knot. It is also easy to teach others who might be fishing for the first time. It can be used with single hooks, lures, swivels and snap swivels. This knot works best with monofilament type lines and is less useful with the new braided lines. While this knot is strong if you have an application where you desire an even stronger knot check out the Palomar knot.
Understanding Knot Terms
There are many terms used when describing tying fishing knots, marine knots, and other types of knots. Two words I will use in the descriptions of my favorite knots will be- Standing End
- Working End
The Working End
When beginning to learn to tie fishing knots, you will need to learn to leave enough extra line on your working end to finish the knot. With practice you will learn to estimate this very closely. As you progress through tying the knot you will quickly learn to tell if you will run out of line on your working end. Sometimes you will need to just start over because you will not have started with enough extra line on the working end to finish the knot. The rope used in these pictures is of course much bigger than fishing line - as a result the knots in these pictures are much bigger than you will make with your fishing line.. When done tying any knot trim any excess line on the working end so that it will not be in the way.
As an Amazon Associate we earn from qualifying purchases. Recommended items have been personally owned, tested or we have fished with anglers who were using them.

Tying the Clinch Knot
 Starting this Knot
Starting the Knot
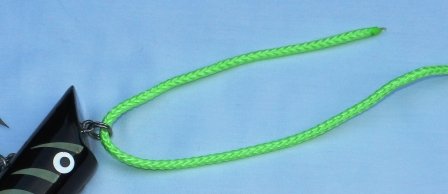
The first step in tying your clinch knot is to pass the working end of your line through the eye of the hook or your lure as shown in the picture above. Leave enough extra line on the working end to be able to make several loops around the standing part of your line.
Step Two
 Step Two
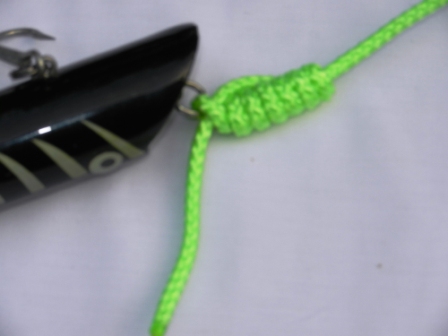
In the second step you will pass the working end over and around the standing part forming 8 loops. Keep your eye on the opening that remains near the hook eye or the lure where your initial loop was formed.
Step Three
 Step Three
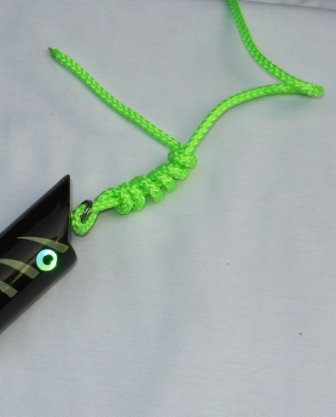
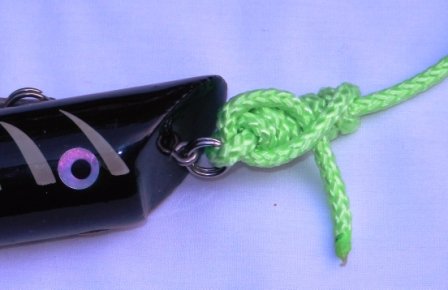
In this third and final step you will pass the working end down and through the small opening that remains near the hook or lure. Tighten the knot down against the eye of your hook or lure. It is often helpful to moisten the line as you are pulling on the working end of your line.
Tighten the Knot
Improved Clinch Knot
 Improved Knot
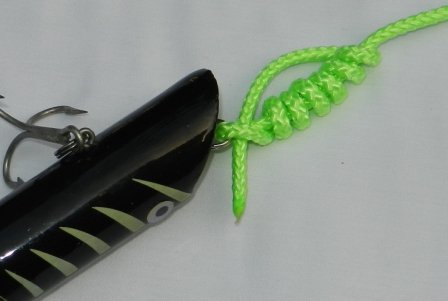
This improved knot has one additional step to those you just accomplished. As seen in the picture above you pass the working end through the last loop formed when you passed that same end through the opening just above the eye of your hook or lure.