Gasket Coil Utility
Learn how the gasket coil can be used to neatly store your mooring rope or utility rope in lengths that are longer even than 100 feet. This is an excellent choice for your longer ropes and even your extension cords. The key to this as you coil your rope is to pay attention to the natural curling nature of rope or extension cord. Continue to rotate the rope with your fingers so that it lays flat with out causing the loop to curl.
Gasket Coil Step One
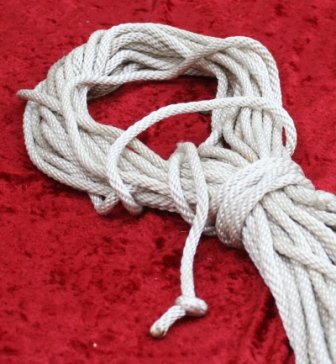
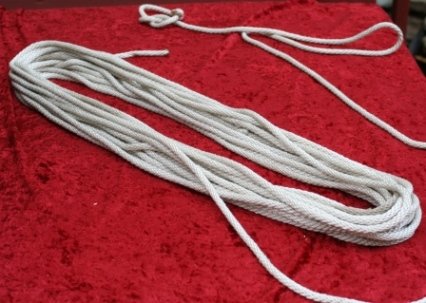 Step One
The first step really is a repetitive process. Form multiple loops with your rope. Experience will tell you how big the loops should be. Longer-heavier ropes will need longer loops. This rope is 3/8 inch and is 100 feet. The loops are approximately 2 feet - roughly the length of my fore arm. Note how the loops have been made with the natural curl of the rope taken out so that the loops do not twist. This is important so that when you un-wrap your rope you can best avoid tangles so long as you are careful to remove the loops in sequence.
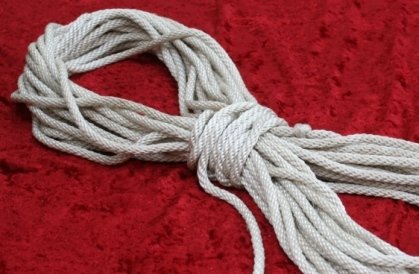
Step Two
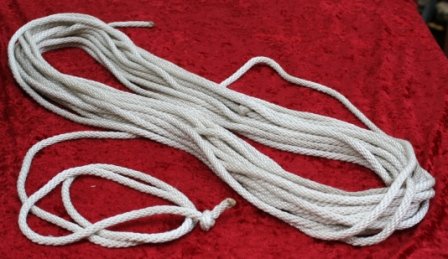 Step Two
The second step comes once you have coiled up the majority of your rope. Leaving approximately 2 feet of rope on your working end to wrap around the middle of the coiled rope. Note in the picture below in the next step how you wrap the working end of the rope around the middle 4-5 times. This secures the entire coiled rope from coming apart. Not locked yet, but an important step none the less.
Step Three
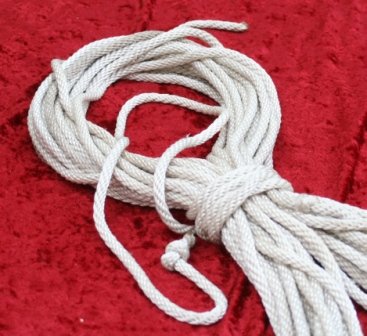 Wrap Around the Middle
Note in the picture above the loop that is formed in the remaining portion of the working end. This loop will go into and then under the loop formed by the coils of rope seen in the picture. In the picture below you will see this loop sticking out at the top of the photo. This is the beginning of the locking process. Easily undone, this loop will be pulled around then down to the middle of the gasket coil. You must be certain that the working end stay near the center wraps of the coil.
Locking Step
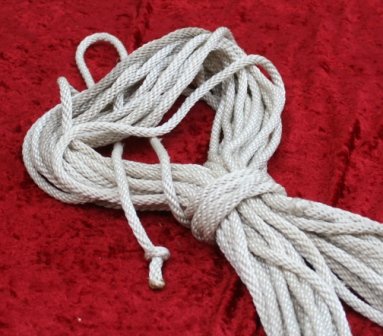 Begin The Locking Step
Grasping the locking loop you just formed, being careful not to allow the working end of the rope to leave the middle wraps, work the locking loop over, around, then down the stack of coiled rope towards the middle wraps as seen in the picture below.
The Final Step
 Lower the Locking Loop
In the last step simply tighten the locking loop by pulling the working end of your rope. Note how you should be able to hang your rope neatly for storage on a peg, post or nail through the top loop of your gasket coil.
 Tighten the Locking Loop